by Tim Kvidera [Click Here for PDF Version]
To get the optimal performance out of one’s birds it is essential that a flyer house his competition kit in a manner that minimizes stress on the birds and does not allow them to “waste” energy before released for training or competition flies. This requires that the birds be kept in kit boxes, rather than being allowed the freedom of a community loft with multiple perches, fly pen and the like.
Besides giving the birds a secure, familiar and non-threatening environment, kit boxes also give the handler the opportunity to customize the feeding regimen to the dietary needs of each specific bird of the kit when they are housed individually. A kit box needs to be sufficiently large to hold the bird comfortably, but not so large that it can unnecessarily expend energy while being confined. The actual dimensional size can vary depending on space available. My individual kit boxes are 18 x 18 x 14 inches and arranged in a battery of three rows of three in a hallway space outside of the other sections of the loft. See photo #1.
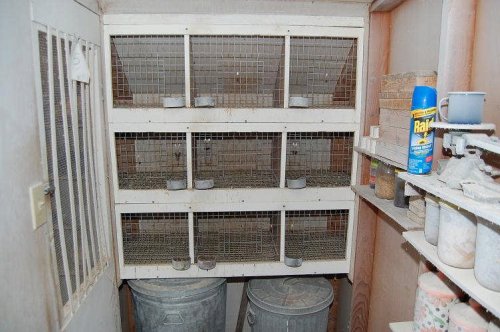
Photo #1 Tim Kvidera’s Flying Tippler kit boxes located in hallway outside of the young bird section. Individual birds are fed in tuna cans clipped to the outside of the kit box. After eating a water cup is placed into the can for the bird to get a drink.
The row of kit boxes has a wood framed wire front which is easily detached by loosening a few mounting screws. I use 1 x 2 inch welded wire for the fronts, A 9 x 9 inch access door is cut from the wire and an oversized piece of 1 x 2 wire is used to fashion the door which is “hinged” by wrapping some of the vertical wires of the door around the horizontal wire of the kit box front. Doors are latched by a bent piece of scrap wire attached to the bottom of the door. A 2 x 4 inch hole is cut into the kit box wire front adjacent to the access door to allow for clipping a tuna can to the front to be used as the feed/water container. See photo 2.
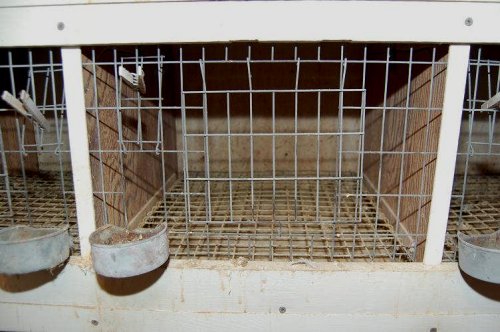
Photo #2 Close up view of Tim Kvidera’s individual kit box front
After removing the front panel from the row of boxes the suspended 1 x 1 inch wire floor can be easily removed for cleaning the droppings that have accumulated on the solid plywood sub floor. See photo #3. Having the feed/water outside the kit box and the birds on a wire floor minimizes the possibilities of birds having to deal with contamination of feed/water or have to walk in their own droppings. All of which enhances the chances for good health.
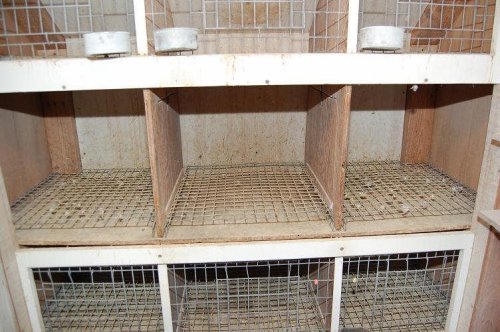
Photo #3 Row of kit box fronts removed exposing the elevated wire bottoms which can then be removed for cleaning of droppings beneath the wire.
None of this is extremely unique. Most serious fliers have something similar. The novel twist I have added to my kit boxes is the ability to readily reconfigure a row of individual kit boxes in to a larger community kit box. Why would I want to do that? The simple answer is — young birds.
Whether just weaning youngsters away from their parents, or in the early stages of settling and making a kit from young birds, housing a group of squeakers together allows them to help teach each other the ropes. A young bird that does not eat well, or does not find water for a day or more, gets set back in its development. And if you are trying to get a kit of youngsters going for early competitions you cannot afford to have any of them set back.
After a week or two of communal living you should be able to move them into individual kit boxes should they be determined to be kit candidates and worthy of individual attention.
I am sure that there are many ways one could devise sliding dividers for the interior walls of adjacent individual kit boxes, but what I settled on and have successfully used for decades is the following.
After framing in the nine individual kit boxes in the battery out of plywood I used a saber saw to cut a large hole in each of the six interior walls removing most of the wall, leaving about an inch or two, front and back, top and bottom. The cut out piece is then used as the door between adjacent individual kit boxes. When one is removed you have a double sized box and when both are removed you have a triple sized kit box. These wall panels are too large to be pulled out the front door of the kit boxes, so when I remove one I slide it to the far wall of the left or right kit box and stand it in the corner.
To hold these side doors in place while being used as individual kit boxes I nailed thin slats horizontally along both sides of the bottom edge extending down vertically enough to overlap onto the remaining frame left in the side wall. An end view of the bottom edge of the door would look like a capital H. The verticals of the H are the added slats while the hollow in the top of the H is the side door and the hollow in the bottom of the H is the lower portion of the wall frame left in place after cutting out the door. On the top edge of the door another slat is added to one side of the door. An edge profile of the top of the door would look like a lower case h with the left side vertical of the h being the added slat and the hollow under the hump of the h being the door. On the opposite side of the door to the top slat a spring flap latch (like used to hold in storm windows) is added to hold the door in place when used as a wall for the individual kit box. See accompanying photos #4 and #5.
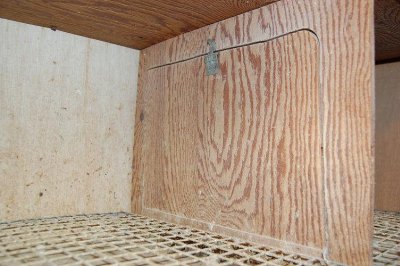
Photo #4 Close up of the side door in place that can be removed to expand the size of the kit box.
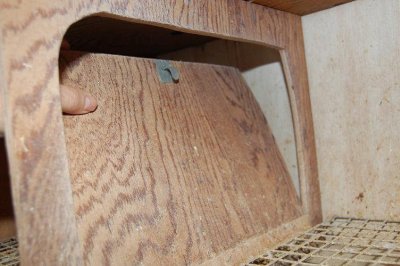
Photo #5 Side door being removed.
When using a community kit box, the birds are fed in trays placed inside the box which are then removed after the birds are done eating. Watering is done by placing cups in the tuna cans outside the cage.
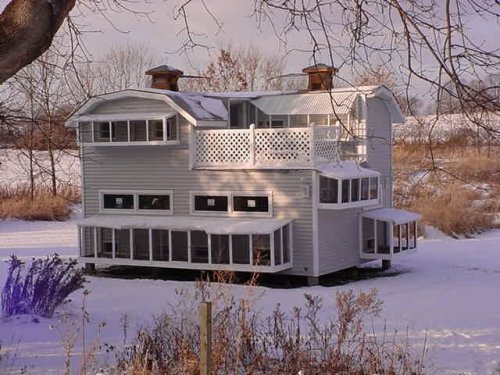
Tim Kvidera’s beautiful loft – Prior Lake, MN, USA